Website and Images © 2014 Betty Mackey
Something Special in Garden Books
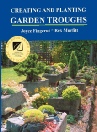


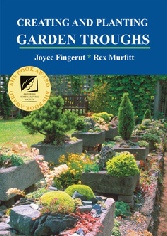
Creating and Planting Garden Troughs, by Joyce Fingerut and Rex Murfitt, is out in paperback , 168 pages long. This book has been called the bible of trough making and won a book of the year award from the American Horticultural Society. Here is the classic hypertufa technique plus variations, for making troughs large and small. This illustrated book covers trough history, making troughs, planting troughs, plants for troughs, and landscaping design with troughs. Published by B. B. Mackey Books. Special price $20.00 postpaid. List price $23. ISBN 9781893443211. The book photo and Paypal Add to Cart button are just to the right.
Free Directions: How to Make Troughs and Other Garden Items


Make a Small Trough for your Plants with Papercrete, Hypertufa, or Mortar Mix
Making stonelike small troughs is easy using different kinds of concrete.
Concrete is composed of Portland cement plus aggregates or filler. Different kinds of filler such as sand, pebbles, peat moss, perlite, and paper give you different effects. Concrete cures best at temperatures between 50 and 80 degrees F. Complete curing takes 28 days. You can check projects in a day or two and unwrap them. If they are semi-hard, smooth the edges with a scraper or chisel. Rewrap the project in plastic and let it continue to cure.
HOW-TO: Use a dust mask! You mix all the dry ingredients together, add the water, form the trough, and let it cure. Unlike clay, no firing or cooking is required, and your finished trough won't crack during winter freezes and thaws. Do it with any of three simple recipes below. Be sure to have extra ingredients on hand because it takes a lot of concrete to make a trough.This is a dusty job and should be done outdoors if possible.
Hypertufa is a variant of concrete containing Portland cement, perlite, and peat moss. It is similar to mortar mix and to regular concrete, but lighter in weight. Proportions are 2 parts Portland cement to 2 parts peat to 3 parts perlite. It will take 20 or more cups of Portland cement to make a moderate sized trough.
Papercrete is similar to hypertufa but uses shredded paper instead of the peat moss. The proportions are 2 parts Portland Cement, 2 parts (dry volume) finely shredded paper loosely packed, and 2 to 3 parts sand OR perlite. Papercrete has a fairly smooth consistency and the paper fibers make it easy to shape. It takes a little more water than hypertufa. When ready to use, it should be very thick and hold its shape when squeezed into a ball.
Mortar mix, sand mix, countertop mix, and post-setting mix are types of premixed concrete. Just add water and if you wish some reinforcing fibers. The mix usually contains only Portland cement, lime, and sand in the correct proportions and can be gotten from the hardware store in 20- to 80-pound bags. Mortar mix makes a dense, heavy trough, but if you are making only a small project it is not a problem and can be done with little fuss. There are many kinds of mixes. I like the “S” type of mortar mix from Quickcrete but beware, it comes in 80 pound bags.
Those mixes including a bonding agent are gooey and hard to handle. Countertop formulations behave more like liquid and tend to flatten out. Walls are harder to build. They are great for paving stones and troughs made between two molds.
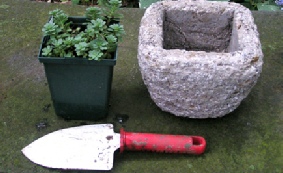
Supplies
You will need sturdy rubber gloves, a large trowel or small shovel, a dust mask, a wheelbarrow or mixing container, plastic sheeting to protect your work space, a mold or form for the trough, plastic bags to line the mold or form, a source of water, a measuring cup, and a board upon which to make and transport your project.
Step 1. Pick a Project. Decide what kind of cement you will make (mortar mix, papercrete, or hypertufa) and how you will mold it. Get your mold or form ready (see the three simple projects below) and place it on a plastic-covered board. Put on the gloves and dust mask and then pour all the dry ingredients into the wheel-barrow or mixing container. Break up lumps. Do not add water until the mold or form is ready. When the concrete mix is wet you can remove your mask.
Step 2. Basic Mixing Technique. Once your mold is ready and placed on a board, moisten the ingredients with as LITTLE water as possible (eg.12 cups mix and two cups of water) and knead it in thoroughly. Make a stiff dough that holds its shape without dripping or crumbling. Add water if necessary. Follow package instructions if you are using a mix. Smack and pat the concrete mixture into the inside of, or onto the outside of, your mold or form, your choice. Work it very firmly to get out as many of the air bubbles as possible.
PROJECT A: Small Trough in a Bucket. To make a small trough inside a plastic dishpan, a round or square plastic pail, or a disposable polystyrene cake cover, line it with an opened-up plastic trash or shopping bag. You can also use a low, wide flowerpot or wooden box. If your form is disposable you don’t need to line it. Avoid straight-sided metal containers for you will have trouble removing the project after it dries, because the concrete expands. Press in the dampened concrete mix, firmly, making an even bottom and then building up the walls. An inch or more of thickness, evenly applied, is good. Cut out or shape a drainage hole in the center. Without removing it from the bucket, close the bag over the wet trough with a twist tie and set indoors or somewhere in the shade to cure. Do not bump or disturb it until it’s hard.
PROJECT B: Birdbathing Bowl. To make a birdbathing bowl, find a large, deep flowerpot saucer (made of clay or firm plastic) about one foot wide and 2.5 inches deep for your form. Place it on the transport board or tray, upside down. Apply a layer of vegetable oil to help release the project from the mold. Starting at the bottom or ground, apply the mix, by handfuls, all around and up the sides, and then across the top. Of course, all will be turned over when you finish and the concrete has set. Smack the mix firmly to make an even coating, at least an inch thick. Use a big nail or wire to check thickness (but then close up the hole). If you like, add three small feet to what will become the base, by making three two-inch wide balls of concrete mix and smacking them on near the center, in an evenly-spaced triangular arrangement. Then wrap it loosely with plastic sheeting and set in the shade to start to cure.
PROJECT C: Paving Stones. Find or make the molds. For identical pieces, make several molds or a reusable one. Four narrow rectangles of foam board can be nailed, then taped together. A rectangle 12 by 15 inches is easy to manage; larger sizes are trickier. Or use strong wooden or cardboard boxes reinforced with plastic and duct tape. Set the mold you are working with on top of a carrying board. Mix the concrete (step 2) and pack it tightly into the mold, starting in the middle and working toward the outside. Keep the depth even, measuring it with a nail. Two inches is a good thickness. Cover the finished trough with plastic and let it start to cure in the shade.
CD: HOW TO MAKE PAPERCRETE TROUGHS AND PLANTERS. $10 USD postpaid. The papercrete CD shows the step-by-step process and gives the recipe for making troughs out of papercrete. Papercrete is a variant of hypertufa that replaces the peat moss with recycled paper. After watching this colorful 16-minute show you can easily make troughs, birdbaths, stepping stones, fake rocks, and more. It is available to USA and Canadian residents. This story CD may be projected and shown to groups such as Master Gardeners and garden clubs. The images pan and zoom Ken Burns style and the CD comes with its own Photodex launcher so it can play on any Windows computer but not MAC. Buy the disk online using PayPal (above).